How I built this GitHub pages site using Codespace
How I built this site using GitHub Pages and Jekyll
I took inspiration in building GitHub Pages from Simon Willison’s blog post. Jekyll provides some simple templates.
However, installing Ruby, Gem, and Jekyll on my local machine (Mac PowerBook Pro M1) did not go well. I almost gave up.
Then I stumbled upon a way to build the site using GitHub codespaces and it worked like a charm.
I first used the theme Minima but quickly realized I would have to make a lot of modifications to add tags, categories, and a search function. I then found the Minimal-Mistakes theme which has a two column layout and many features built in.
Codespaces is a VS Code interface that is hosted on GitHub. It is a way to code in the cloud. If you are able to set up your local machine, you should be following roughly the same steps.
A) To build the site using GitHub Codespaces
-
Set up a GitHub account if you don’t have one.
-
Go to the Quick-Start Guide for Minimal-Mistakes to gain a basic understanding of how to use the theme. In this page is a link for Minimal Mistakes remote theme starter
-
In the Repository name, enter your GitHub username.github.io. For example, mine is kcalhoon.github.io.
-
To start a Codespace, click on the green “Code” button and select “Open with Codespaces”. This will open a new browswer link that is a VS Code interface.
-
In the VS Code interface, click on the “Extensions” icon in the left sidebar and search for “Ruby”. Install the “Ruby” extension.
-
Install Jekyll and Bundler by running the following commands in the VS Code terminal:
bundle config set path 'vendor/bundle'
bundle install
- Install Jekyll by running the following command in the VS Code terminal. This will start the Jekyll server. The –livereload flag will refresh the page when you make changes to the code, add pages, etc. Note changes to _config.yml require you to restart the server using the following command:
bundle exec jekyll serve --livereload
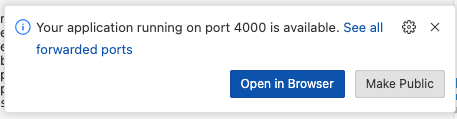
- A pop up will give you the option of opening the new site in your browser.
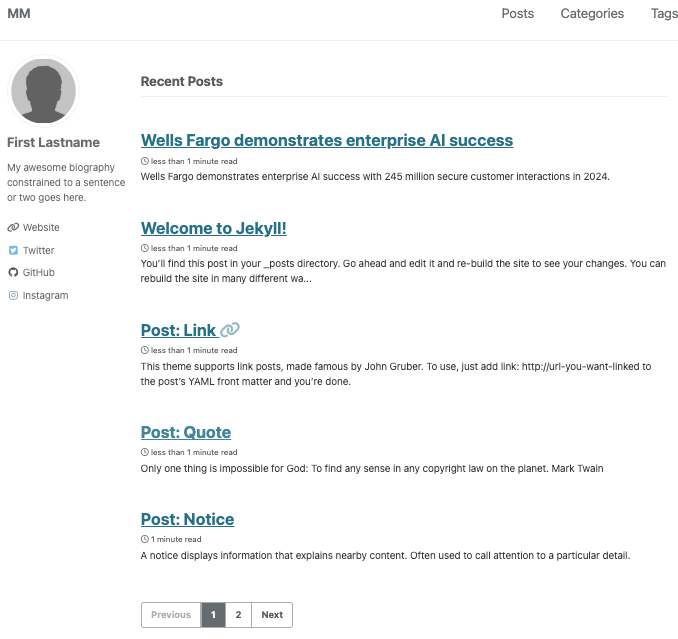
- You should see a site like below. You can click around to see the different features and templates.
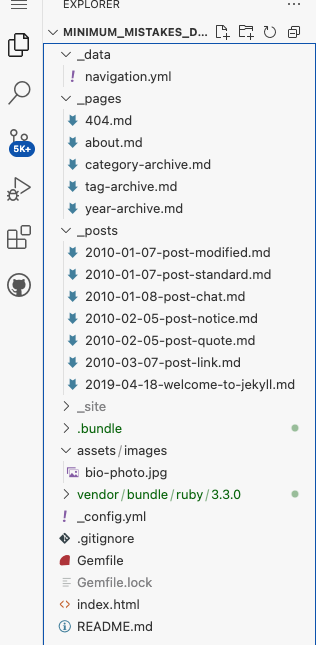
- Go back to the codespace terminal, expand the folders and you can see the files for the pages, posts, images, etc. The various files will provide hints on how to customize the site.
B) To publish your site externally, do the following:
-
Make sure your GitHub repository is public (or upgrade your subscription). In your GitHub repository, go to Settings > General > Danger Zone > Change repository visibility (to public)
- Confirm GitHub Pages settings:
- Go to your repository on GitHub
- Navigate to Settings > Pages
- For “Source”, select “GitHub Actions” (not “Deploy from a branch”)
- In the _config.yml file, update the following:
baseurl: "" # as a user site, leave blank
url: "https://yourusername.github.io" # Replace with your GitHub username
- Make sure the Gemfile has the following:
gem "jekyll", "~> 3.9.3"
gem "jekyll-paginate", "~> 1.1"
gem "jekyll-sitemap", "~> 1.4"
- Add a .github/workflows/jekyll.yml file (optional but recommended). This enables GitHub Actions to build and deploy your site:
name: Build and deploy Jekyll site to GitHub Pages

on:
  push:
    branches: [ main ]

# Sets permissions of the GITHUB_TOKEN
permissions:
  contents: read
  pages: write
  id-token: write

# Allow only one concurrent deployment
concurrency:
  group: "pages"
  cancel-in-progress: false

jobs:
  # Build job
  build:
    runs-on: ubuntu-latest
    steps:
      - name: Checkout
        uses: actions/checkout@v4
      - name: Setup Pages
        uses: actions/configure-pages@v4
        with:
          enablement: true  # This will enable GitHub Pages if not already enabled
      - name: Setup Ruby
        uses: ruby/setup-ruby@v1
        with:
          ruby-version: '3.1'
          bundler-cache: true
      - name: Build with Jekyll
        run: bundle exec jekyll build
        env:
          JEKYLL_ENV: production
      - name: Upload artifact
        uses: actions/upload-pages-artifact@v3

  # Deployment job
  deploy:
    environment:
      name: github-pages
      url: $
    runs-on: ubuntu-latest
    needs: build
    steps:
      - name: Deploy to GitHub Pages
        id: deployment
        uses: actions/deploy-pages@v4
- In your GitHub repository, select Actions. You should see “Update jekyll.yml” with a green checkmark. This means your site is published. In the left sidebar, select Deployments. You should see a green checkmark for the latest deployment and the url for your site.
C) Troubleshooting
- In addition to the above sources, I recommend using AI to troubleshoot.
Good luck!